We own a 2024 Forest River Shamrock 233s and recently encountered a problem I figured would be good to record a solution to.
This year whenever I went to flush (clean) the black tank with the flush inlet, (clean!) water would start to flood the bathroom floor. We were in a rush to get packed up and checked out, so we cleaned it up and didn’t inspect it further.
Fast forward to last week when we were on the road. In our downtime I did some reading and learned about the existence of the RV Vacuum Breaker Check Valve – specifically the cheap plastic version they put in campers which often breaks. And the symptoms were exactly what we were experiencing.
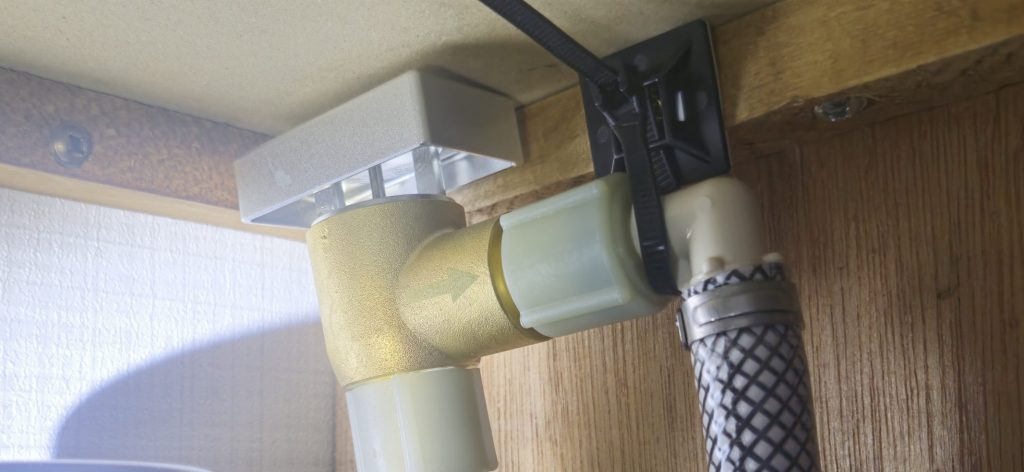
This little thing sits up under the bathroom sink in the Shamrock (and Roo).

I ran to the hardware store to quickly bypass it, with 1/2″ NPT nipple and elbow, just to get us temporarily up and running.

Note – only do this as a temporary measure, and only when you’re using a separate hose to do the flush. Without the check valve, if the campground pressure were to drop, bad water and/or vapors could siphon backward into your fresh water.
I then immediately ordered a non-plastic version, and installed it when we got home. Here’s to hoping we never have to think about this again.
As a side note, we had also recently noticed unwanted odors in the bathroom of late. I suspect this was the culprit.
Hope this helps anyone else having that problem!