
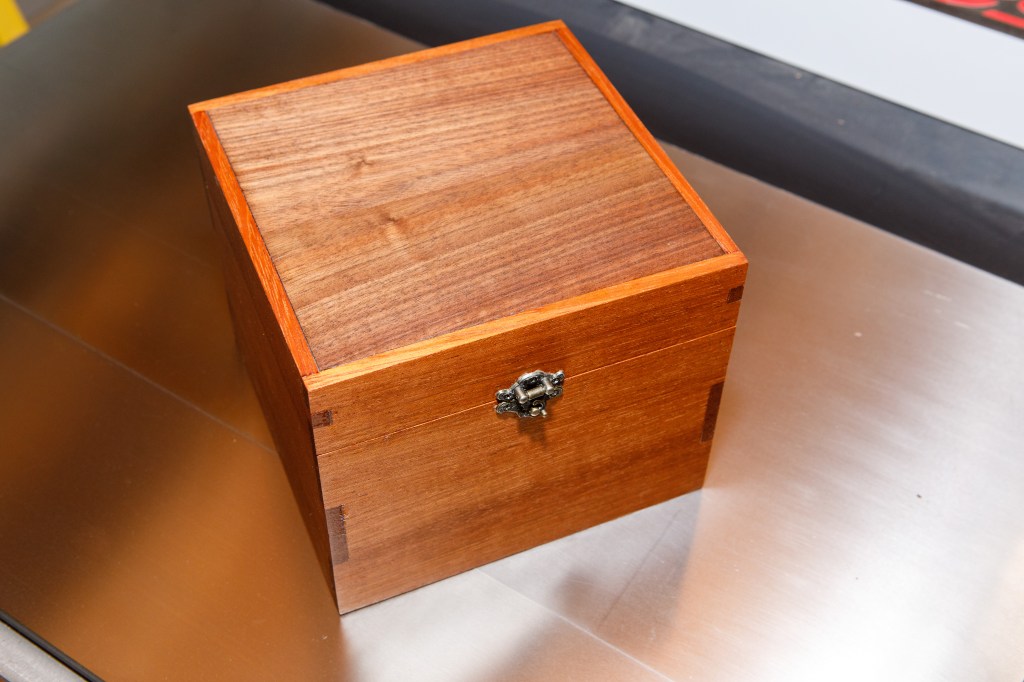
This week I made a recipe box for Ana. Unlike my typical builds, I was not going off of any plans for this. I decided to just do a couple rough sketches and wing it.
I started with a board of Brazilian cherry (Jatoba) and two small boards of walnut. Since the overall dimensions were larger than any of these boards, I had to resaw the Jatoba and glue up a panel to serve as the sides of the box. One new aspect to this box from my priors is the thickness – just under 5/16″ thick. I was nervous about this for a couple reasons, not the least of which was the screw sizes I had available for the hardware. I cringed running the panel through the planer, just hoping it wasn’t going to crack or shatter but it went through unscathed and without snipe.

I wanted to get more practice using the hand saws and chisels so I decided to cut the joinery by hand rather than use the table saw. They could be tighter and I need to be more mindful of staying at 90 degrees on my crosscuts, but the final product is workable. It was a little tricky keeping track of which were mating pieces and which faces were interior vs. exterior, so I resorted to some mixture of alpha- and numeric labeling of the pieces as I was cutting. It turned into quite the jigsaw puzzle.

Both the lid and the bottom are made from walnut, both of which were resawn and glued into panels before cutting to size.
After making panels which were to serve as the bottom (over 1/2″ thick) and the lid (3/8″ thick), it came time to cut the dados for them to fit into the sides. And this is where I made the late night mistake of forgetting about blind dadoes and their necessity when you’re doing joints like this.
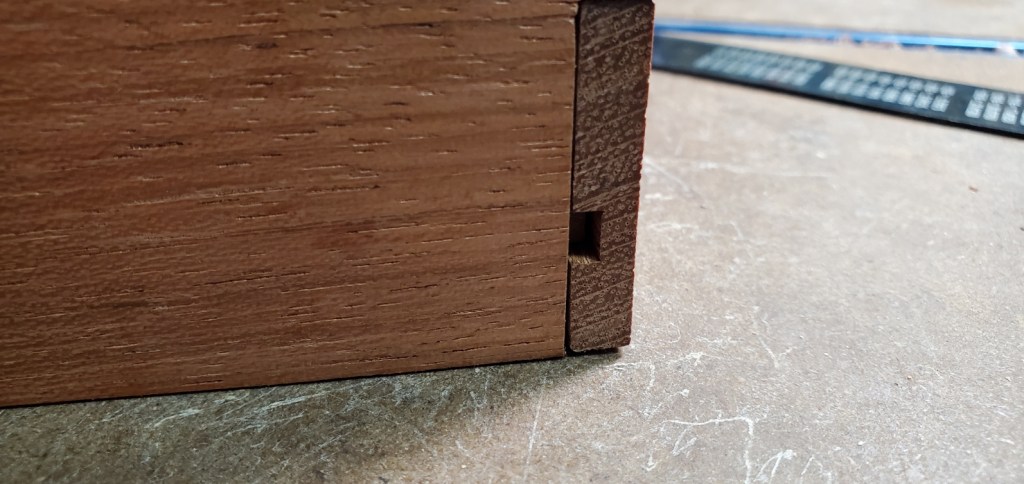
After some cursing when I cut the bottom’s dado all the way through, I took corrective action and handled the lid’s dados correctly.

This is the first box I’ve made where I’m following the process of making an enclosed cube and then separating the lid from the base at the table saw once everything is glued up. Here’s how the pieces fit together before the glue-up.

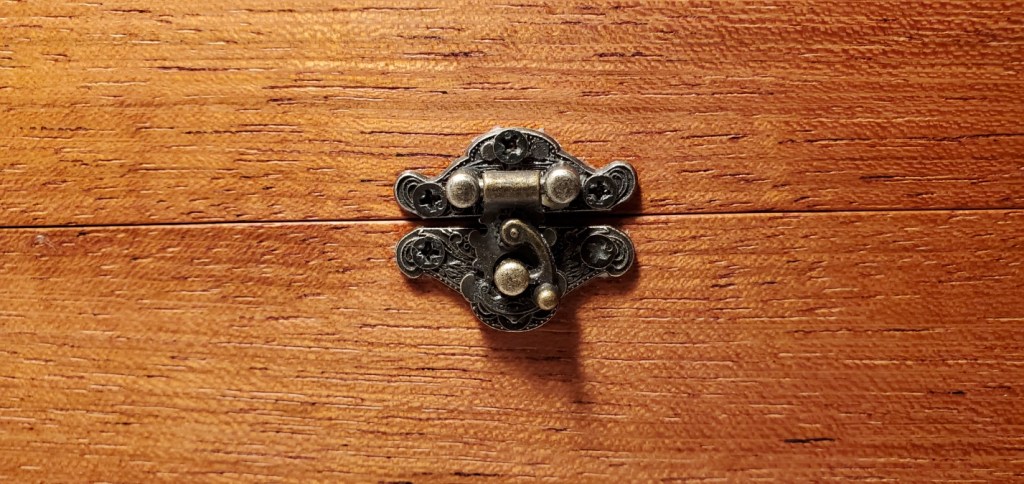
Separating the lid from the box was a breeze on the table saw, as was adding the hardware. The interior dimensions turned out perfect for both the 4×6″ recipe cards as well as their oversized divider tabs. I finished the box with Tung oil finish and paste wax.
I really like the warm tones of the wood; the thickness (thinness) of the sides give it just the right feel I was looking for; and the size of the hardware turned out to be almost perfect. This all added up to a finished product that looks and feels like what I had in mind when I started. That feels good.


Leave a comment