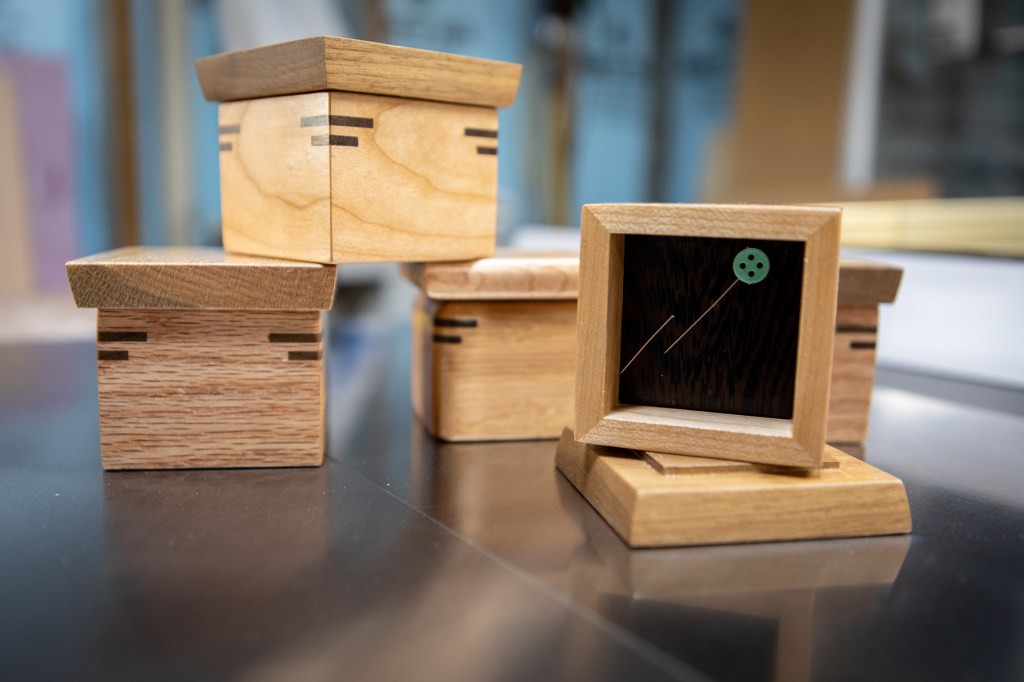
In an effort to learn some new woodworking skills, I’ve been working through a book, Basic Box Making by Doug Stowe, on small box making. I’ve made several different types now, each one better than those before it.
Here’s some of the first set, made with a mix of oak, cherry, and walnut. In one I embedded a pair of small magnets so Ana can use it to hold pins and needles at her sewing table.
They’re a big hit with my kids, and I’m sure my relatives will tire soon of receiving boxes I don’t have a use for 🙂
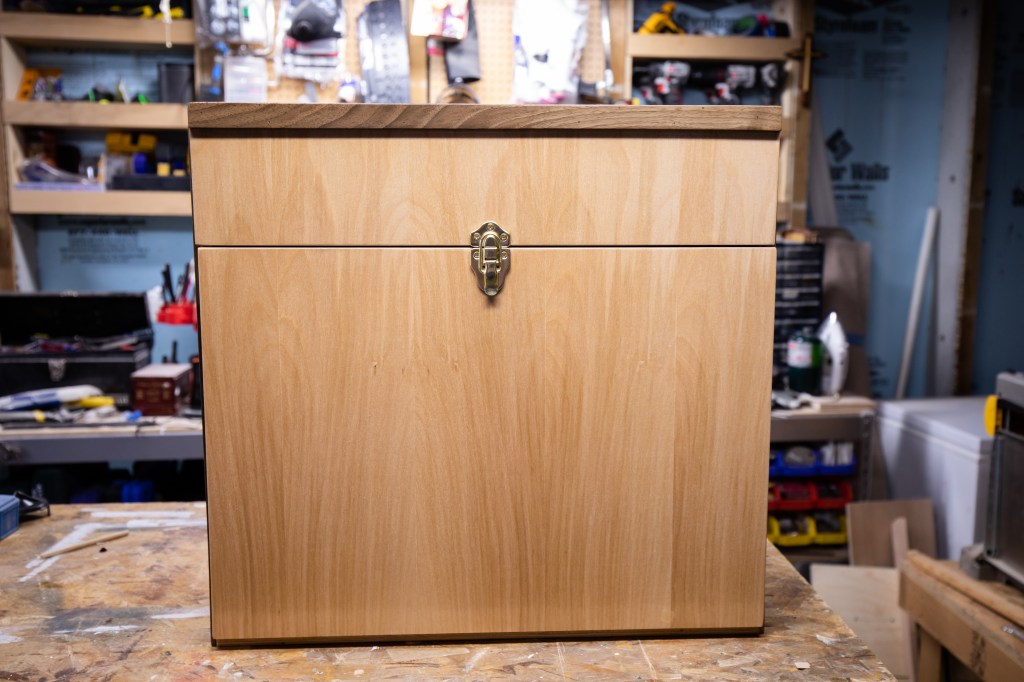
A couple years ago I built a chuck box for food and cooking while camping. It worked out so well I decided to make one for my dad as gift this past Christmas.
He has a smaller stove and doesn’t need food or cooking space for 4 people, so I was able to make it quite a bit smaller and lighter.
It’s birch plywood, trimmed with solid walnut. Finished with several coats (5 maybe? I can’t remember) of Helmsman Spar Urethane.
Funny story, I actually had to make this one twice. The first one I screwed up by making the top too shallow, so it has since been repurposed and tweaked to be a rock-tumbler-case for Claire’s rock tumbling hobby. I’ll post photos of that soon.
Looking back, it was 2007 when I built my first workbench. While it has served me well in the 13 years since, I have spent many more hours working on it than I have in the past and I’ve started to feel some of its shortcomings. Not wanting to spend a small fortune on a good Sjoberg’s woodworker’s bench, I spent the holidays doing a few worthwhile upgrades.
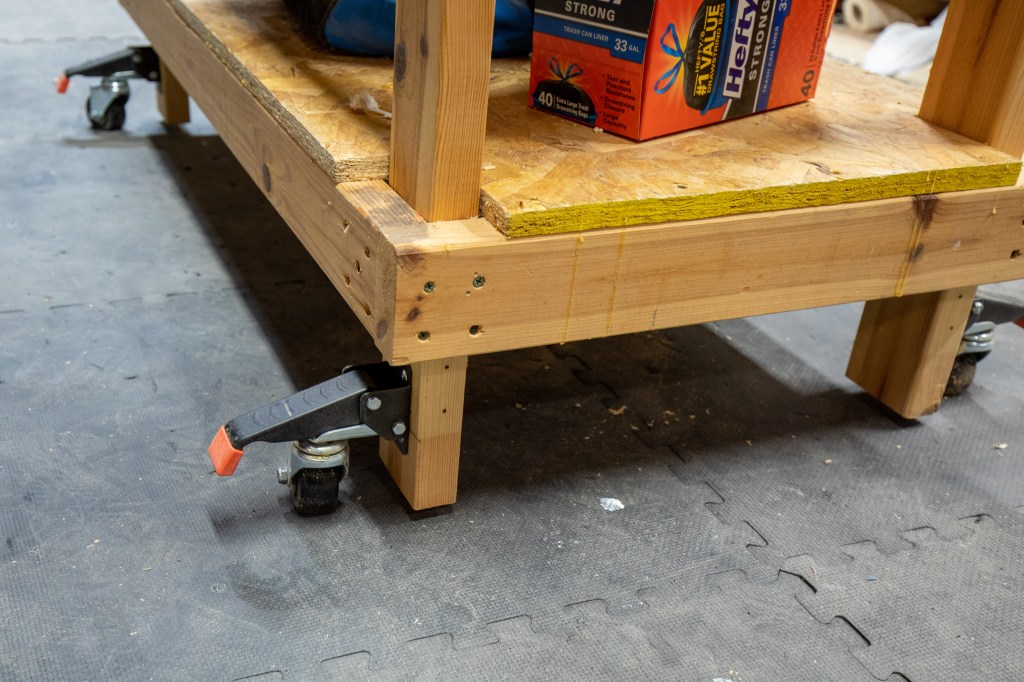
Retractable Casters
First up is to replace the always-on casters. They’re great for easily moving it around but not so great when trying to do something like plane a board. Even with the brakes, the bench would slide.
These are Spacekeeper Workbench Casters which can support 660lbs. Since they’re replacing much larger casters and mount differently, the overall bench height was lowered approximately 6″. Not ideal, and I gain some back with the next upgrades, but it’s so nice to be able to completely lower it and it doesn’t budge.
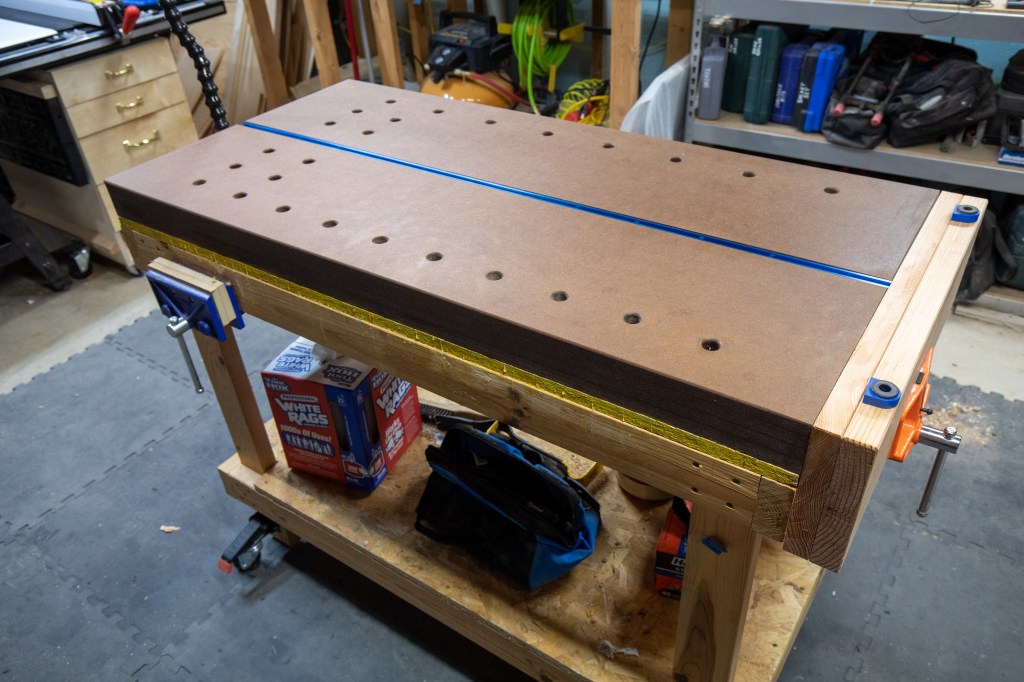
New Top
This was the main reason for the upgrades – a new work surface. After the recent work building my kids’ desks, I’ve been envious of benches with bench dog holes. Much of that work would have been simpler if I could have used bench dogs and holdfasts.
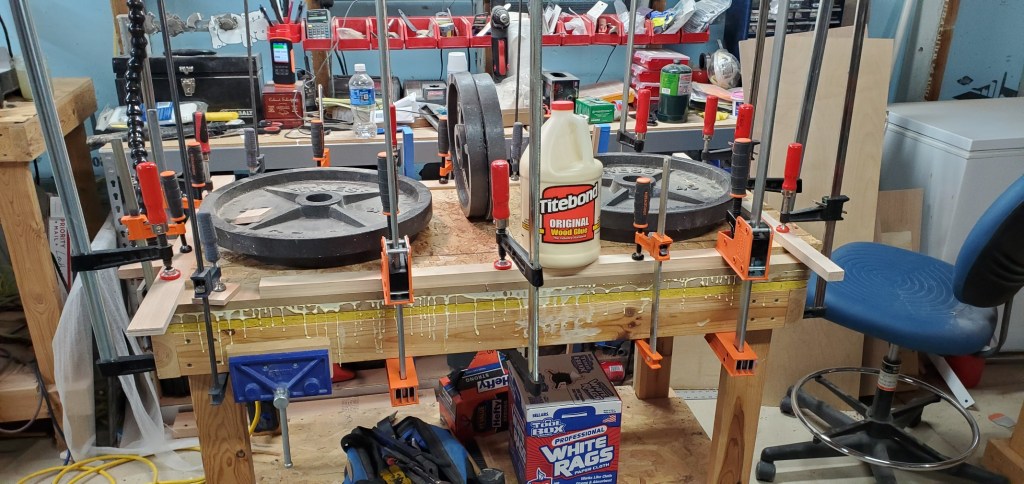
Following Rob Cosman’s plans, I decided to make my new top using 4 layers of 3/4″ thick MDF. I’ve never used so much glue in my life.
I didn’t ever want to deal with any sag from the MDF so I decided to keep the original bench top (OSB), just placing the newly laminated 3″ hunk of MDF on top. It’s safe to say this adds quite a bit of heft to the whole table, it’s going nowhere.
Following Rob Cosman’s recommendations, I rounded over everything with a 3/16″ roundover bit, coated the dog holes with superglue for strength, and soaked the top with 8 coats of tung oil. He wasn’t kidding when he said it would just soak up the oil, I’ve used almost 32 ounces. It’s still curing, 2 weeks later.
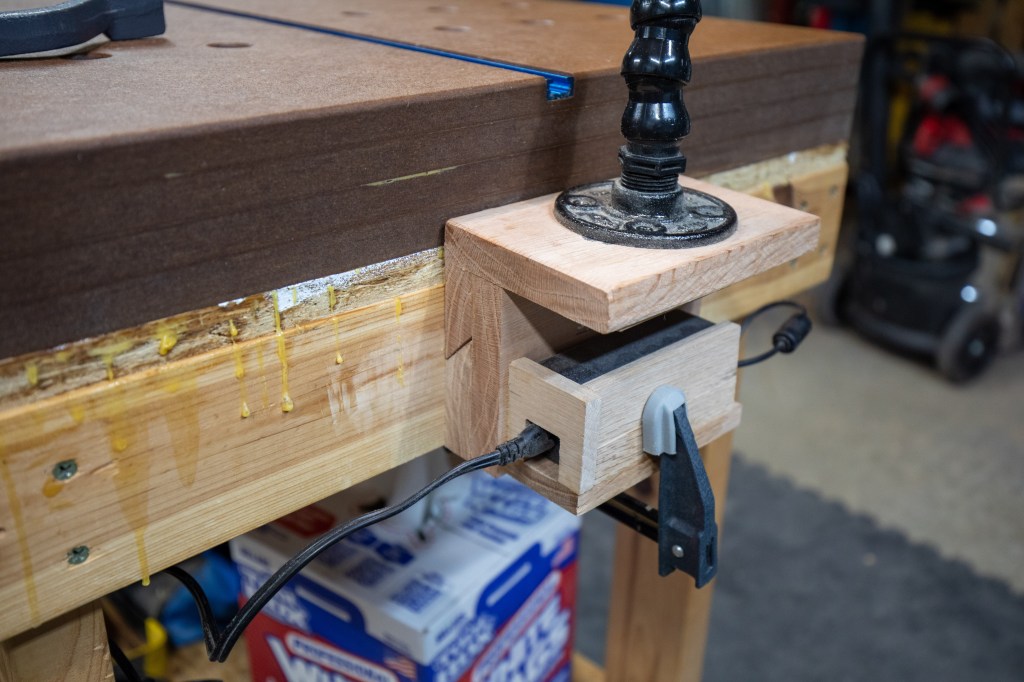
Tail Vise
Next up was the purchase of a new vise and creating jaws to span the entire end of the bench – to create a decent tail vise. I went with just an inexpensive, medium duty Pony. The jaws were just some junk “value wood” from Menards so I could try out my new jointer.
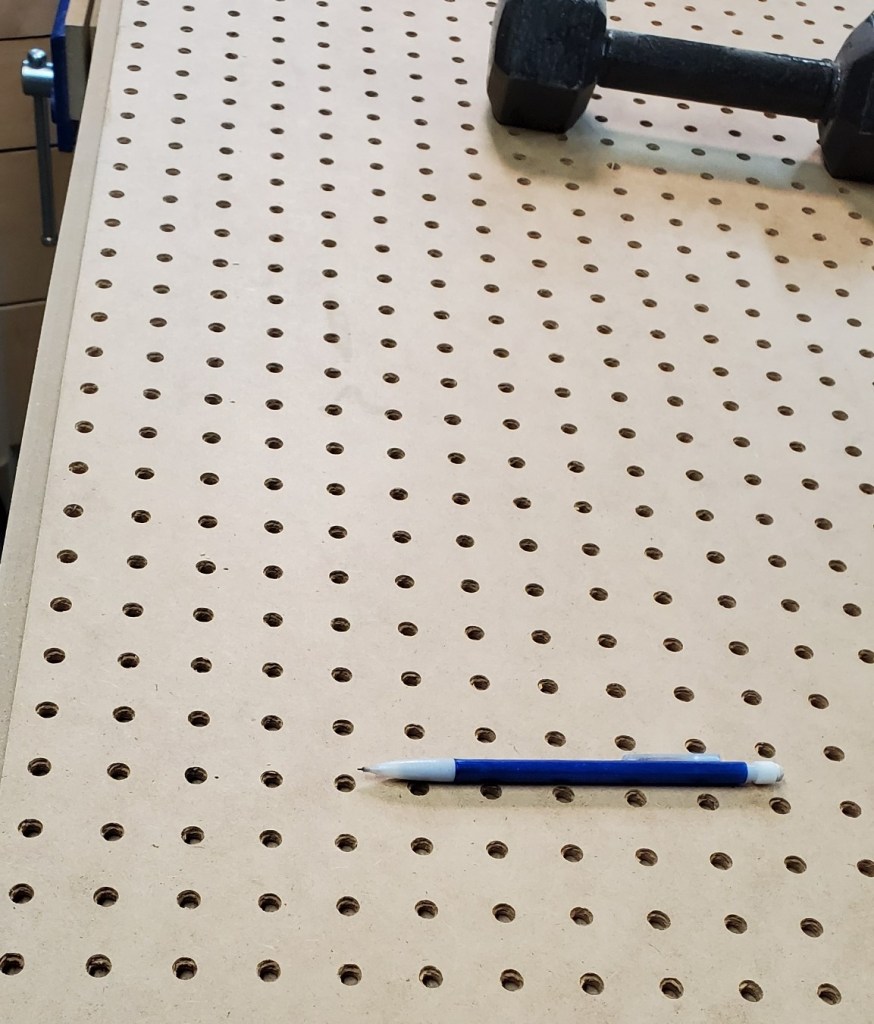
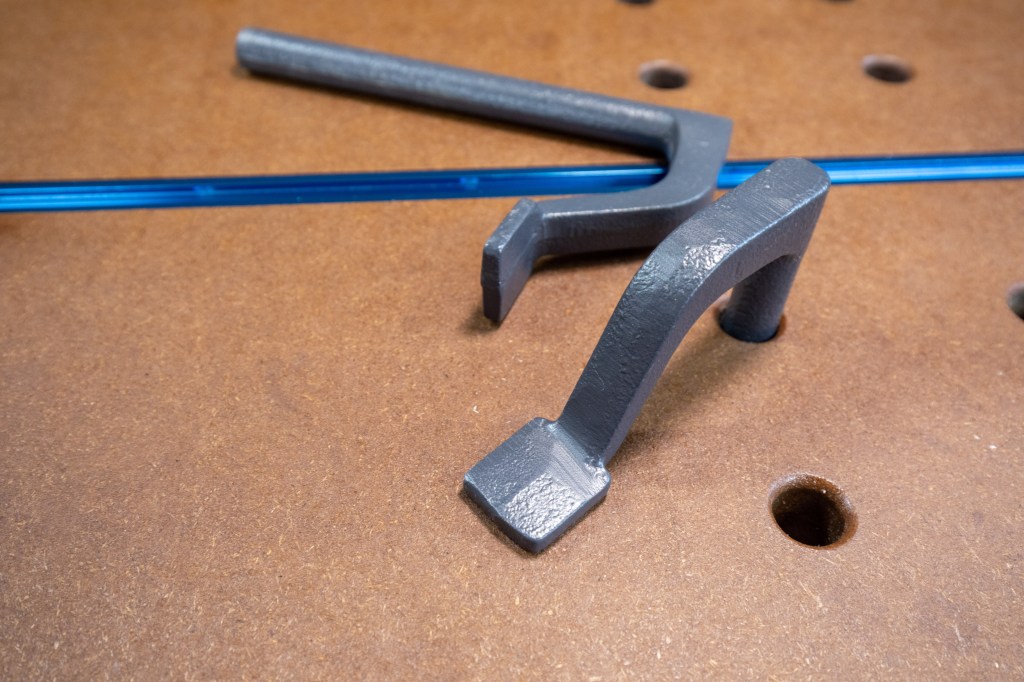
Dog Holes
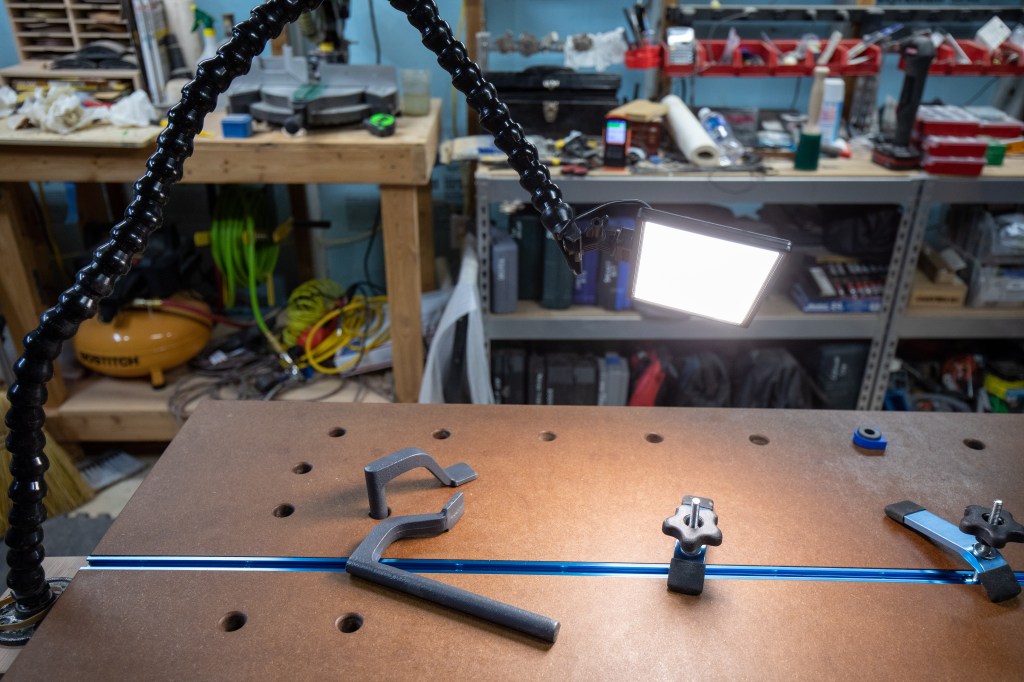
For those unfamiliar, dog holes are used to hold various accessories – usually for clamping things down. Small pegs, called bench dogs, often go in them to grip wood between them and a mating dog on the vise (see the blue piece above).
I used a 3/4″ spade/paddle bit and a Portable Drill Guide to make the holes all the way through the bench top. Using a sheet of pegboard, I got the spacing how I wanted, and went to town.
This turned out to be more work than I expected. That thick MDF not only dulled my bits very quickly (had to hand sharpen them every 4 holes), but quickly had me switching to a corded drill I haven’t used in 10 years.
T-Track
While I was at it, I figured I may as well just give myself even more hold-down options. So I installed a T-Track down the center.
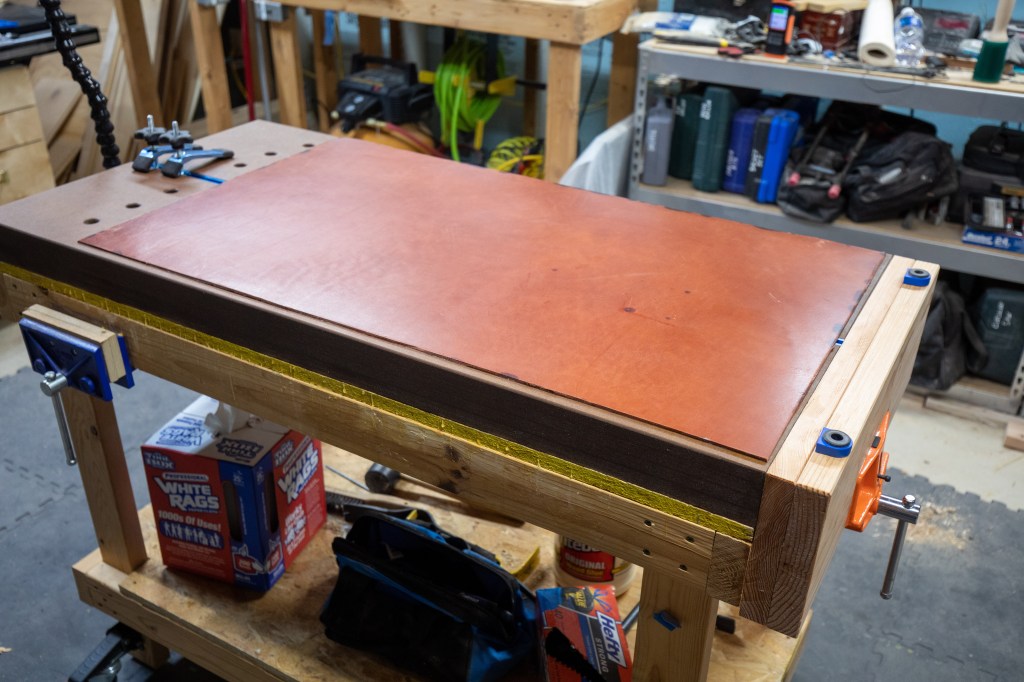
Leather Pad
I watch a lot of Adam Savage’s Tested YouTube Channel. His use of a leather pad to protect his benches from glue and accidents was the inspiration for me to scour the internet for a good piece of leather. I succeeded with a wonderful piece of sole bends (I had never heard of that term before looking for this) leather from Brettuns Village Leather Supplies & Trunk Shop. This thing is a monster and should provide plenty of protection for years to come.
Original piece, almost 2’x4′.
4 razor blades and two sore hands later.
Lamp
Ok, this one isn’t new. It’s an Adam Savage one-day-build which Ana purchased components for me for Father’s day. So I got it re-attached, with a French cleat so it can be moved around fairly easily.
A quick note on those holdfasts – at first they were not holding at all. Some troubleshooting led me to the problem that the bench was too thick. To fix this, I counterbored the holes from the bottom so that the depth of the holes was around 2.5″ instead of the nearly 4″ original depth. Once that was done, they’re working great.
In late July we learned the kids were going to be starting the school year from home. We made-do in the spring when everything shut down and they spent the 4th quarter of the school year from home. Claire used a folding table in our office, and David ended up doing most of his schoolwork from the couch or floor even though he did have an old desk of ours at his disposal. With the prospect of long-term schooling at home staring us in the face, we realized spring’s study arrangement just wasn’t going to cut it.
Back in March I upgraded to a good table saw with the intentions of really advancing my skills. In the back of my mind for years has been the thought of making a desk, but I just never felt ready to try. Well, it was either put up or shut up; either make a desk now or buy one and just forget the idea of making one for good.
So I made a desk.
Plans
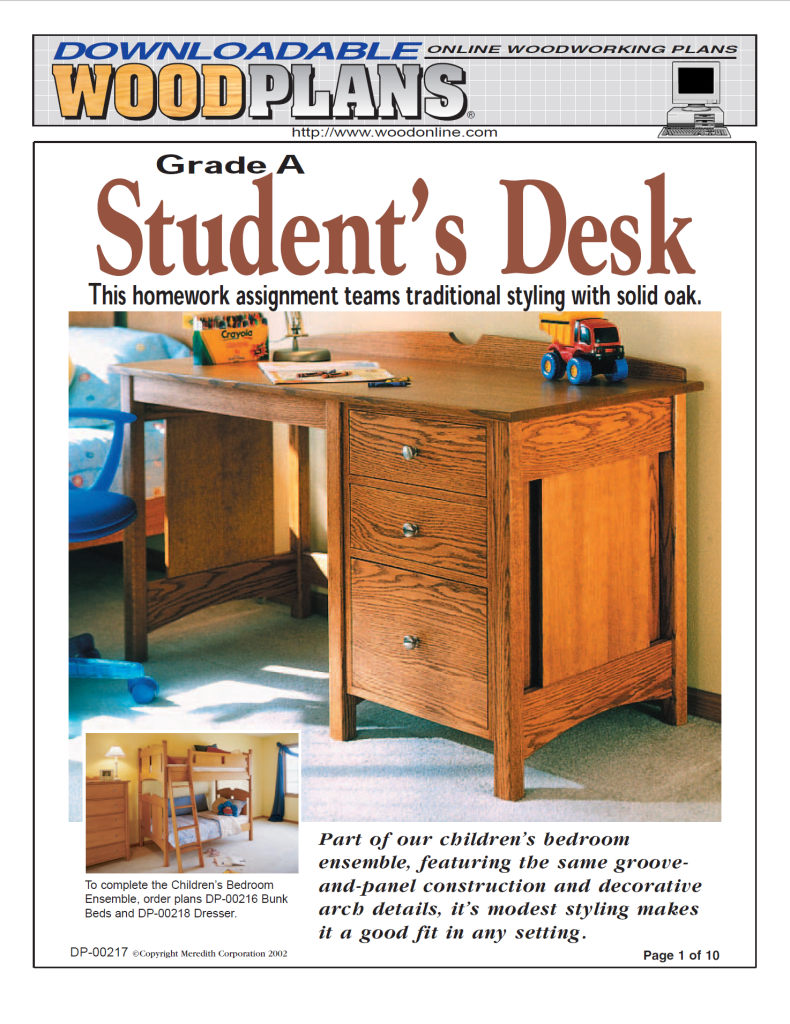
I ran across plans for a good looking, yet approachable desk from Wood magazine. It uses lots of solid wood and relies on some new techniques that would push me forward (re-sawing on a table saw, edge joining and panel glue-ups, and a large desktop that isn’t plywood, among others). I purchased the plans and the next day was at the store buying the wood.
Here We Go
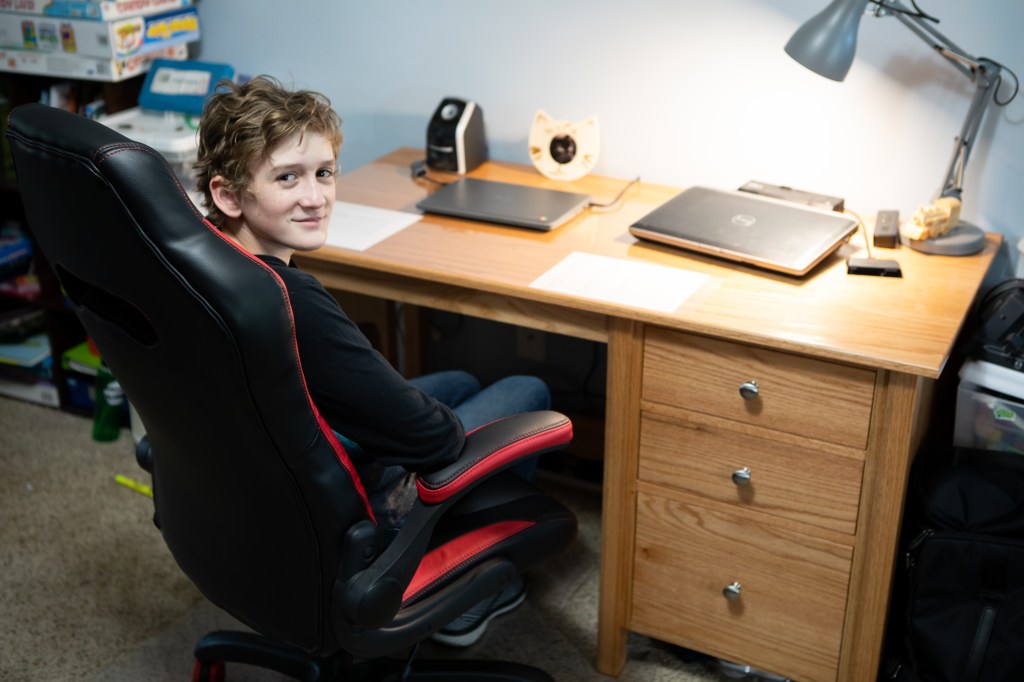
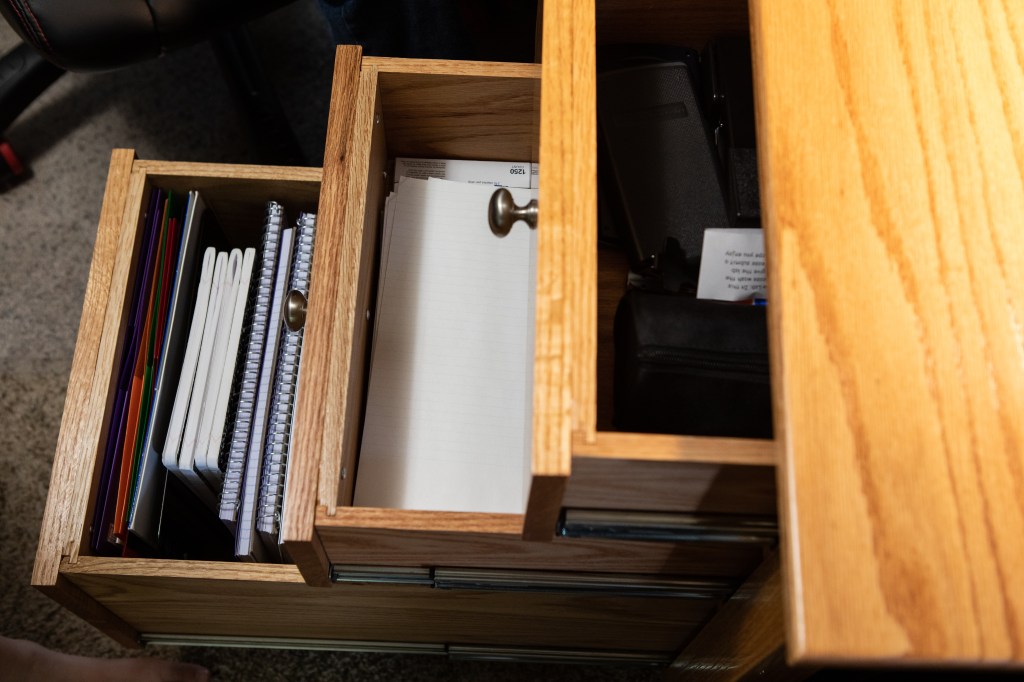
Start to finish, it took one day short of a month. I finished it exactly 12:01 in the morning just a couple days before it was going to be needed for school. I made a couple small changes from the plans: got rid of the “crest” on the top, in favor of more working space; put the drawers on the other side since Claire is left-handed.
Almost every morning I showed Claire the progress from the prior night. I let he pick the stain color from a sample board I made with 8 different stains. As the pile of wood slowly turned into a desk before her eyes, she got more and more excited. With the exception of one weekend for camping, I worked on it a few hours each evening and 4-5 hours per day on the weekends.
The mistakes I made weren’t too big, all recoverable. I found good ways to achieve certain cuts. And I found bad ways to fail others. I was nervous when I started some of the parts but, for the first time in memory, I had a lot of fun building it. Usually I get enjoyment out of having built something; but here I was having fun during the build.
To say I’m happy with the results is an understatement.
I have one very happy customer.
Stain and Finish
As I mentioned, Claire picked the stain. She really wanted to see the wood grain, and have a lighter color, so she chose Minwax Golden Pecan. I used the Minwax pre-stain wood conditioner even though it’s oak and probably isn’t necessary. The majority of the build received two coats of Minwax Clear Satin Polyurethane, with the top getting three. After the final top coat, it was sanded with #0000 steel wool. After this, I applied paste wax and buffed it to it’s shine.
Do it Again!
Sitting around in the evenings after it was completed felt very strange. Combine that with my poor son having a hard time studying on his old hand-me-down desk (yes, that’s sarcasm), and I convinced myself to start a second desk a week later.
Here we are, two days shy of one month after Claire received hers, David’s is done and he has it all setup and ready for school tomorrow morning.
Same finishing process with the exception of 3000 grit sandpaper in lieu of #0000 steel wool after the final coat. Note the drawers on the right side on this one.
Wrap Up
It took only two months, but my kids now have two great desks which should last them a lifetime. It’s so very satisfying to transform a stack of wood into something of substance, I highly recommend it 😉
We went on our first camping trip of the year this weekend, thanks to Illinois state campgrounds and recreation areas finally being opened back up. We spent the weekend at New Salem and used the oven three times – twice for cinnamon rolls and once for biscuits.
We had it up to 450 degrees fahrenheit, and it retained baking-level heat for hours.
The test runs today confirmed that I need to learn how to braze aluminum so I can properly affix the baking rack wires to the rails, but other than that, everything went well. Success!
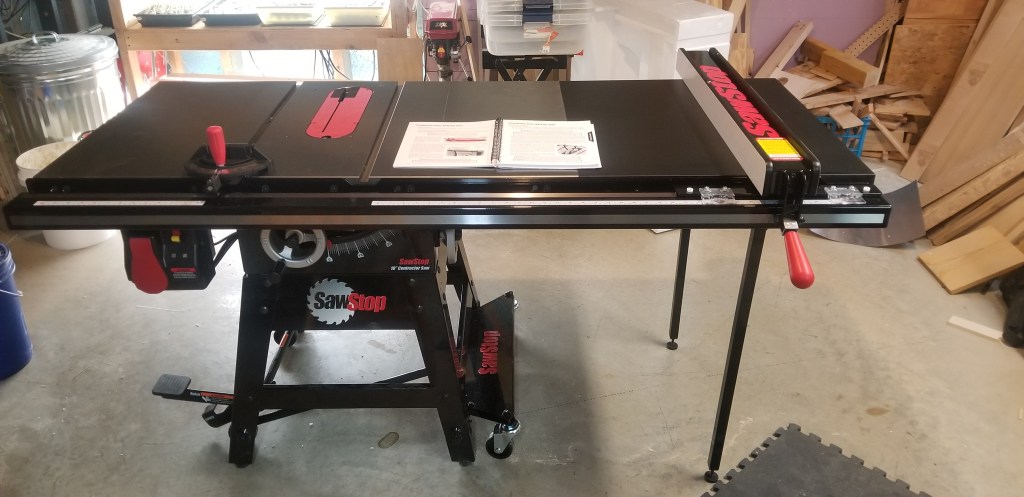
In early March I finally felt worthy to upgrade from an inexpensive Hitachi jobsite table saw to a real one. The inability to consistently create accurate and repeatable cuts on my little Hitachi was causing so much frustration that I was finding myself avoiding projects. The fence was garbage, the entire thing wobbled, and I had had enough.
I placed an order for a SawStop, the contractor model with upgraded fence system, cast iron extension wings, and a 36″ extension table. It arrived a little over a week later, and took 7 hours to assemble, but I have been completely satisfied with every aspect of the tool.
It took me a while to finally make the purchase of a SawStop. The increased cost of this over other really good saws is not insignificant. That said, I hate to call those other saws competitors because the SawStop technology is available nowhere else. Being a software developer who makes a living on a keyboard, the technology is invaluable. For the uninitiated, this saw detects when flesh touches the blade and instantaneously drops the running blade below the table – giving the operator a vastly improved chance of having no life altering injuries.
The purchase was timely. Shortly after delivery Illinois enacted their stay-at-home order, so I’ve had plenty of time to putz around the basement, learn, and put it to good use. I have spent several ours in the basement in each of the 7 weeks or so that we’ve been confined to the house. Projects abound!
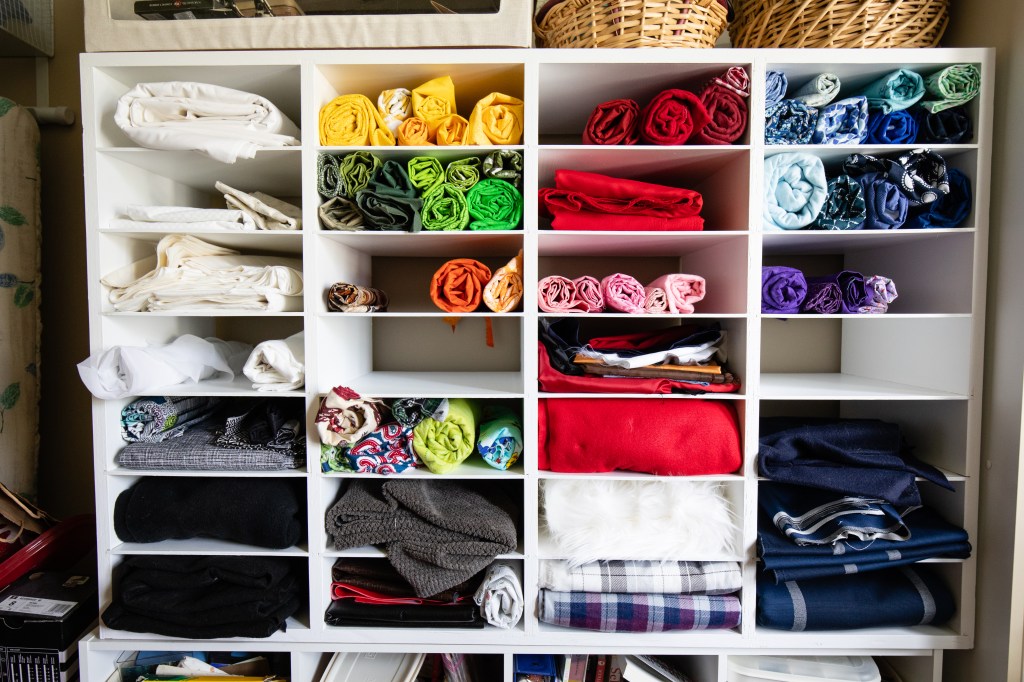
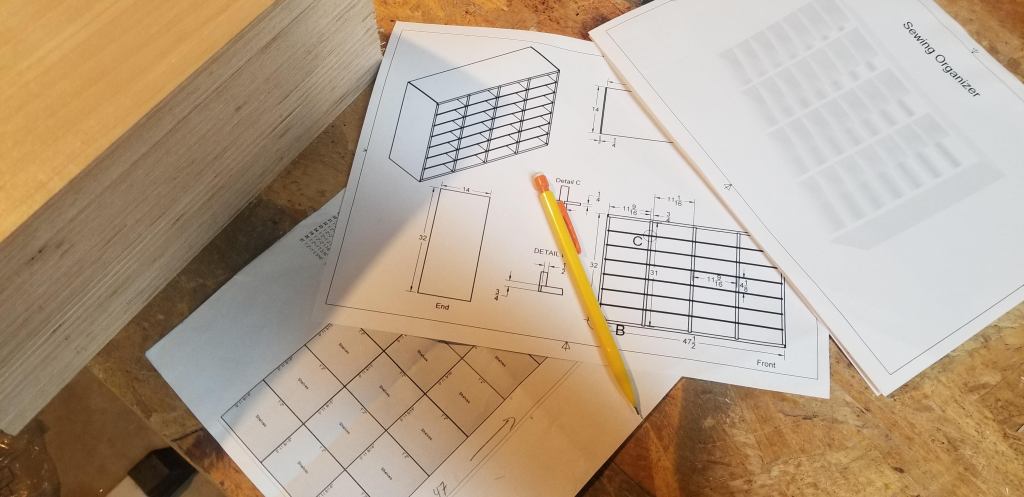
One of my recent projects was an organizer for Ana’s sewing room. She has been overrun by fabric and was in need of something to unstack the piles.
Plans
Earlier in the year I started making the transition from SketchUp to Fusion 360 for my woodworking plans. Since I’m so new to Fusion 360, it probably took about three hours to get the model built how I wanted and plans generated.
I don’t recall having to run back to the computer during the build to check dimensions or fix anything, so I’m satisfied with what I produced with Fusion. A copy of the plans is available upon request.
Build
This build was great for learning how to use my new dado stack. And learn I did. I spent a long time getting the dado stack installed (along with the appropriate SawStop brake) and fence setup for the cut. I made the first two cuts on the board which would later be ripped into two equal halves for matching top and bottom boards, and quickly found that the two dados were too wide.
I was furious.
It wasn’t the common mistake of mistakenly cutting to 1/2″ thick for 1/2″ plywood that’s actually thinner than 1/2″. Nope. This is when I learned there were specific left and right blades!
What made this so frustrating was that I had just enough wood on hand for this build, and now I was going to have to get more wood. During a stay-at-home order.
Sigh.
Later the next week I placed an online order for new wood, which was delivered a few days later, just in time for the next weekend. I don’t think I’ll ever forget about the left and right blades, lesson learned.
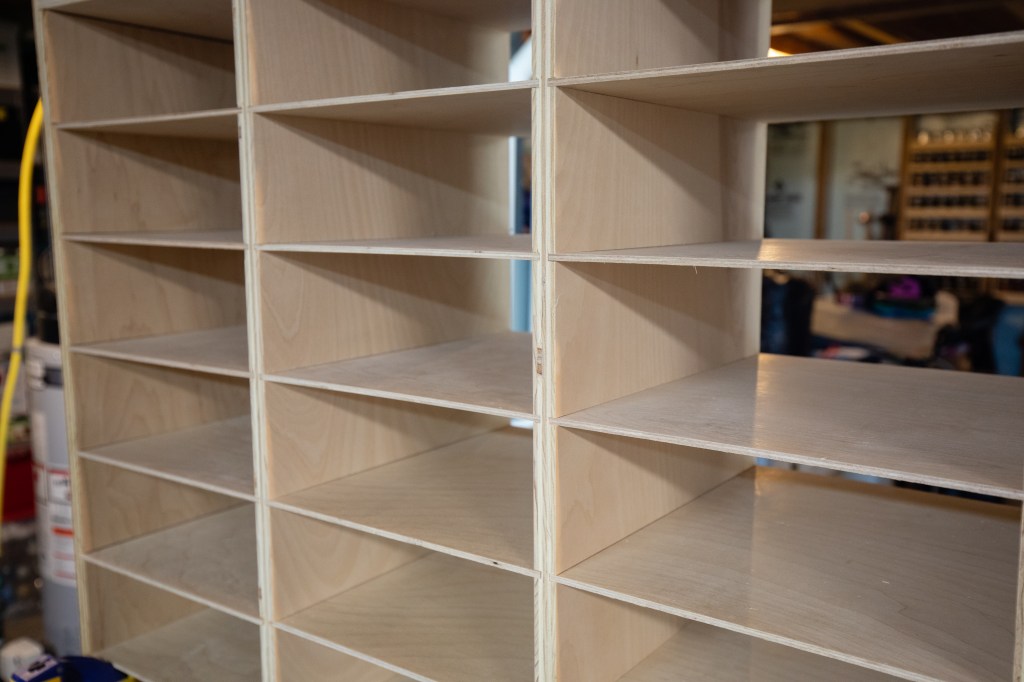
The rest of the cuts went well. With my new saw I was able to make precise and repeatable cuts, and for the first time just assembly line the cuts. It was such a pleasure.
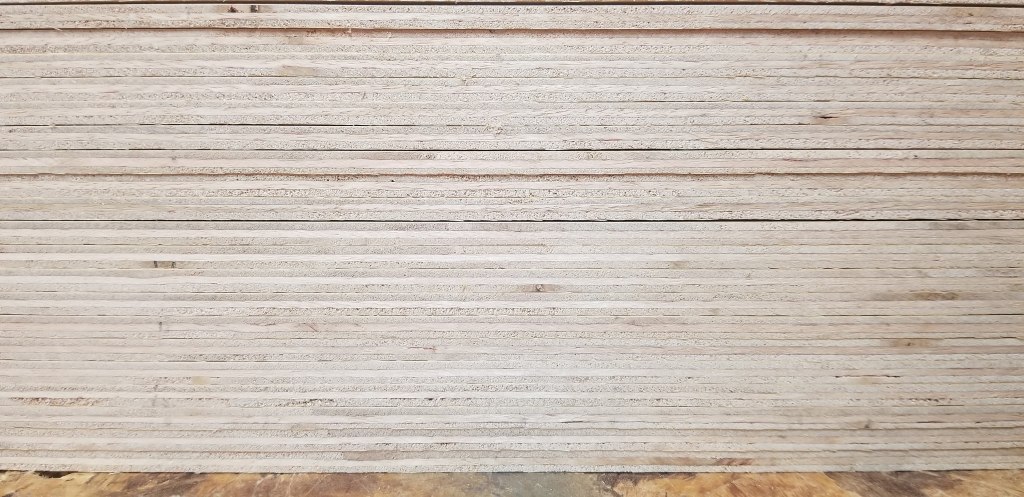
Dry fit before final assembly.Stack of all of the shelves, 1/4″ birch plywood.Of all of the dados, I had little one cutting mistake. I refuse to point it out.
Paint
Procuring paint and materials during the lockdown also delayed the completion of this project. It seems as if nobody ships paint, and buying even white paint online causes pause because you just have no way of telling exactly what shade of white you are going to get.
I placed an order at Menards.com, and they proceeded to somehow ship the order to the entirely wrong city. I later ended up doing curb-side pickup at Lowes for the paint. As an aside, after more than a week of no response from Menards about the order, they shipped a replacement. It arrived at my door just two days ago – but it was not my order.
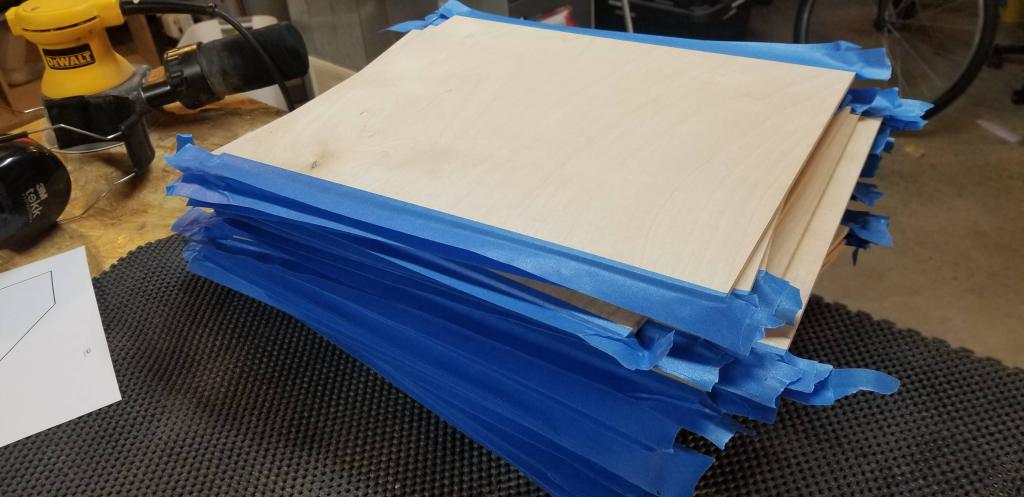
My original plan was to paint the large sheet of 1/4″ plywood before cutting the shelves, but the ordeal in procuring paint interrupted these plans. I knew it was going to be a pain to paint 26 individual shelves but I didn’t want the project to sit while waiting for paint.
I painted the entire thing without the shelves inserted. In order to allow the shelves to be glued after installation, I applied tape along all of the shelf edges which would later get glue and painted around them. It worked well and didn’t turn out to be a huge problem.
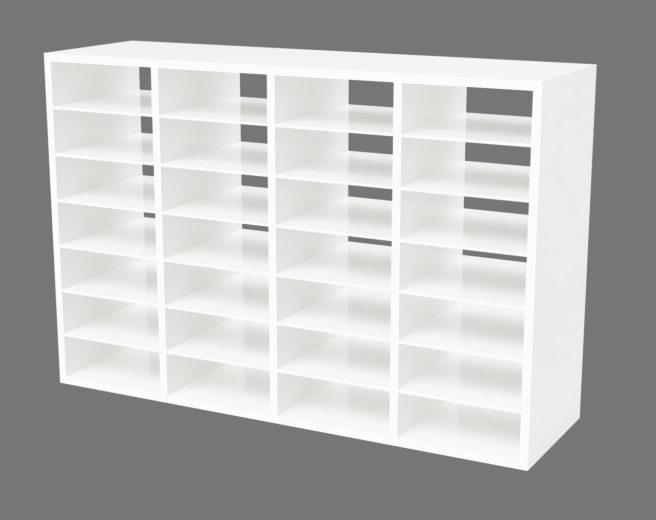
Completed
The completed organizer has been in Ana’s sewing room for about two weeks now and is quickly filling up.
The last couple times we’ve gone camping, my uncle has brought along a small plywood box lined with aluminum flashing which my grandfather made years and years ago – a great little camp oven!
Baking in it is as simple as putting a small tray with a few pieces of hot charcoals in the bottom and food on the metal rack, close the door and wait. It’s perfect for little side dishes to go with the rest of your camp dinners.
In order to compliment the Chuck Box I built last fall, I decided it was time to build one myself. This was the perfect opportunity to address a few of the shortcomings of the original:
You have to open the door to see how the baking is going
The temperature inside is anyone’s guess
As coals lose their heat you want to lower the food closer
Opening the door is the only way to regulate airflow, but you’ll lose much heat.
The last time we went camping, my uncles brought out a small plywood box, lined with metal flashing, which my grandfather had made years and years ago. What was this curious device? An oven!
Here is the final result!
Let’s take a look at its features.
Window
I custom ordered a piece of 1/8″ thick PyroCeram, heat resistant glass for the 3″x8″ window. It can resist temperatures upwards of 1300 degrees Fahrenheit. This was purchased through http://onedayglass.com.
Thermometer
No more guessing how warm it is inside. This is an inexpensive smoker thermometer available through Amazon.com. I picked this one because it is large, has good readability, relatively flat, and had a probe that looked compact enough to not get in the way. It’s essentially countersunk into the door panel and the probe ends up sticking beneath the baking rack and where the coals will sit. I’m sure it will read a little high given the location, but it’s better than nothing.
Adjustable Vents
Airflow can be tweaked by turning either the front or top vents. They’re just like the vents on any grill, wrapped in Anti Slip Traction Tape for easy turning.
One-hand Latch
Knowing we’ll probably be opening and closing this with something in our hands, I wanted it to be easily latched with one hand without fiddling with little metal fasteners. A little spring does the trick.
Adjustable Rack
This still needs a little work, namely I need to learn how to braze aluminum and permanently attach the wires to the sides of the rack. Once that’s done, the whole rack will be able to slide in and out as well as be moved top to bottom.
The remaining two pieces I am contemplating are a handle on the top for easy carrying and two rails on the bottom so the door can open freely if sitting directly on a surface.
We go camping a couple times per year and every time it comes to making meals I get a little frustrated when I have to look in multiple places for things I need. Hunting around in Rubbermaid containers for spoons, spatulas, spices and paper plates – while food is on a hot camp stove – just isn’t fun.
So a few weeks ago I decided to try and remedy this.
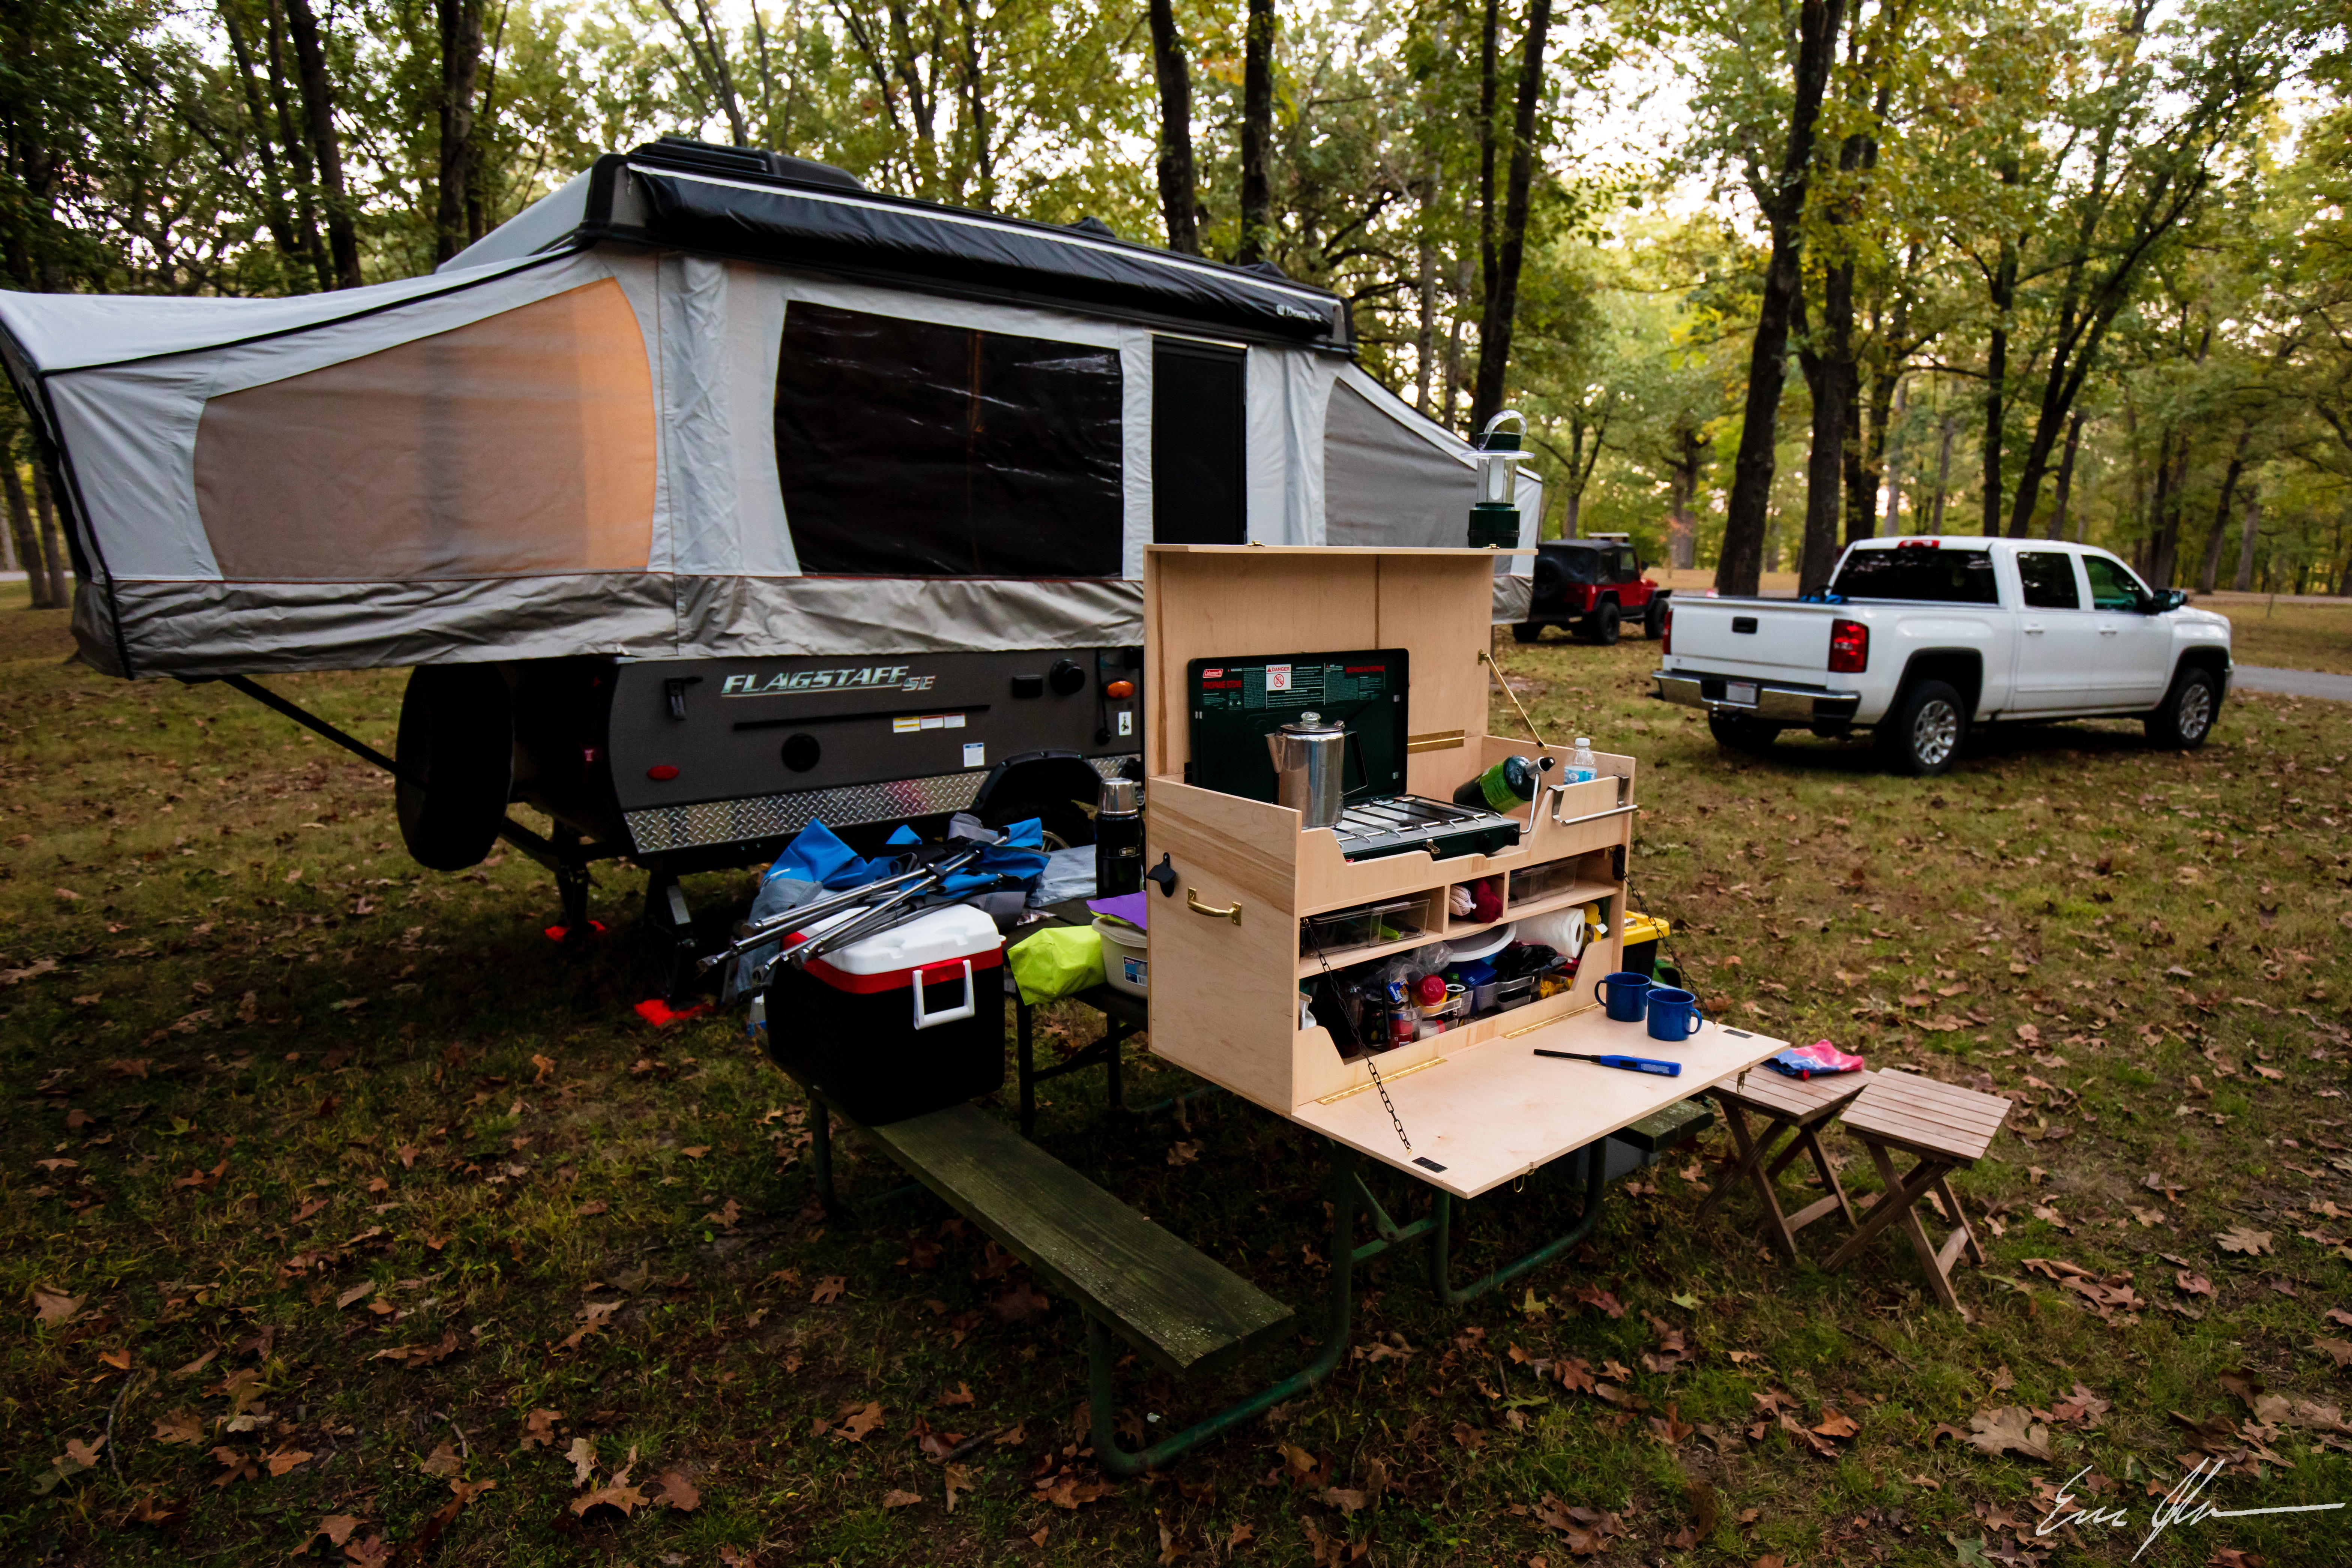
Make no mistake, it’s heavy. Made with a full sheet of 1/2″ maple plywood, it should weigh roughly 48 pounds empty. Loaded, well… like I said, it’s heavy.
Customized to a length of 36″, this box is wide enough to accommodate our long Coleman camp stove, with its propane tank attached. When the propane isn’t attached and the box is closed, there’s room on the top for our dish washing tubs, extra gas tanks, towels, and other random items.
Deviating from the REI plans, the top shelf panel is custom for our stove – with cutouts for the latch as well as burner dials.
I also chose to add an actual lid stay instead of a tent pole to keep the lid open. I was wary of wind gusts blowing the lid down onto a burning stove.
I believe the only other change was the addition of supports underneath the top shelf. These not only support the shelves but also offer more bulk material for the handles to attach to. The last thing I wanted with something this heavy was for the handles to rip off!
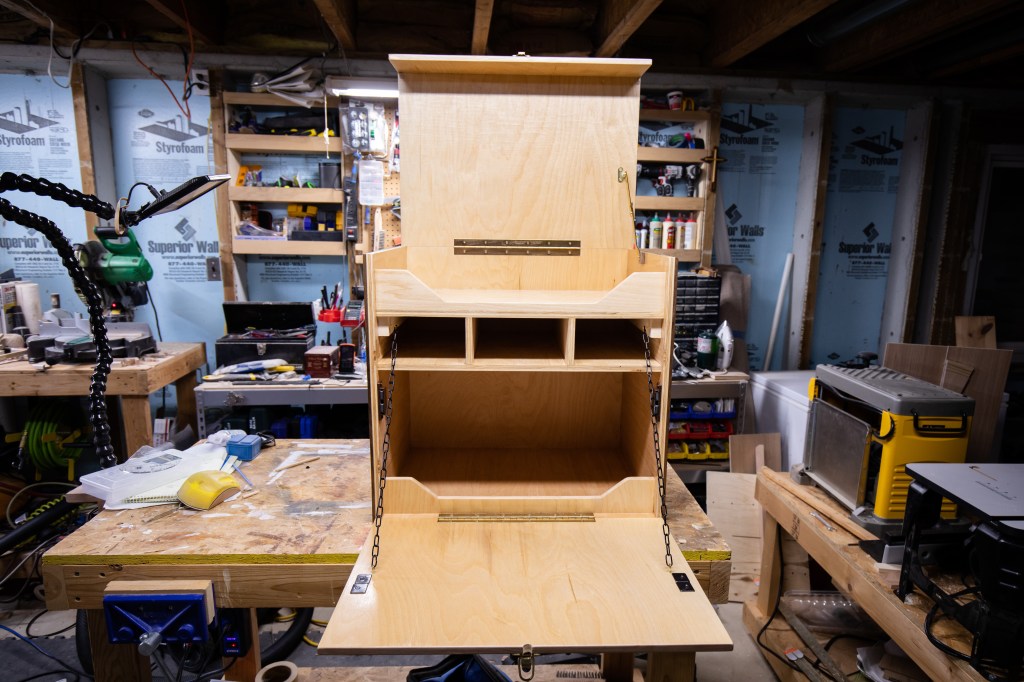
The fold-out front is a perfect table top for meal preparation and holding our cups of coffee while waiting for breakfast. The shelf has plenty of room for a couple utensil/silverware trays and other odds-and-ends.
The fold-out front is held tightly in place by the lid latches as well as a pair of heavy duty magnets. In hindsight, one would have sufficed.
I originally had plans to stain the entire box a green to go with the color of the Coleman stove, but quickly learned that maple just doesn’t take stain well. So I punted and used 4 coats of water based Helmsman Spar Urethane. This won’t be left outside in pouring rain, but it should handle condensation, the occasional rain shower, and the inevitable spills.
Overall I’m very happy with how it turned out. If I were to make it again, I’d forgo making it fit the propane tank and just allow for a hose to exit the box and attach to a propane tank nearby. I’d also consider using 1/4″ plywood for some parts of the shelving, again just to shave off some weight.
Its first weekend outdoors went well and it proved to be even more useful than I had hoped for. Having everything within arms reach was invaluable.